Directions - Water, Juice and Milk Kefir
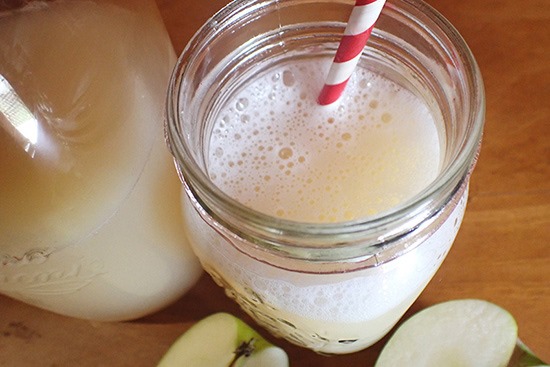
Apple Juice Kefir, All Fizzy After a Second Fermentation
You Will need the following items
- Jar large enough to hold one litre of milk, juice or water kefir
- Stainless steel pot on the stove (or glass jug if planning to heat the milk in a microwave)
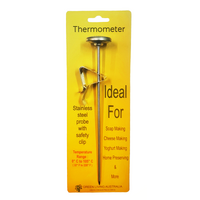
- Dairy thermometer: inoculation temperature can be critical. Too hot and you kill the culture; too cold and the texture changes
- Tight weave cloth and a string or rubber band to secure the cloth over the rim of the jar
Your Ingredients
- One litre of dairy milk, lactose-free milk, coconut milk, coconut water, water or juice
- Sugar to bring the sugar content up to feed the culture when using non-dairy or lactose-free milks, or when making water kefir
- 1 dose of Maintenance Free Kefir Culture
How Much Culture to Use
While the culture must be stored in the freezer, please allow the culture to come to room temperature before opening and handling! Culture readily absorbs moisture from the air. Keep the culture closed as much as possible.
The two jar storage and dosing method will help you get the most out of your culture.
- Place all of the culture in one of the two sterile jars we supply.
- Estimate 1/10th of the contents and place into the second jar. This becomes your "working supply".
- Label both jars and store in the freezer.
Your "working supply" being approximately 1/10th of the original supply of culture, will inoculate 10 litres of milk or yoghurt.
Estimation is acceptable - too much can’t hurt and too little will just slow the process.
Note: you can increase or decrease this recipe as necessary to make larger or smaller batches of kefir.
Milk Kefir
You can use pasteurised and homogenised milk, ultra-heat treated (UHT) long-life milk, non-homogenised milk or lactose-free dairy milks to make milk kefir.
As dairy proteins naturally bond together as acidity increases with the growth of the bacteria you will notice the milk kefir will thicken a little.
Non-Dairy Milk Kefir
You can also make non-dairy milk kefirs. Choose a milk with no preservatives and read the nutrition panel to ensure there is 4%, or 4 grms per 100 ml, sugar available for the culture to eat.
If the milk contains 3.6 grams per 100 ml, for example, that is 36 grams so you need to add around 5 grams of sugar. Using measuring spoons a teaspoon is about 4 grams.
Tip: As you will not see any visible change we recommend keeping a small sample of the milk without any culture aside so that you can make a taste test comparison.
Water, Fruit Juice or Coconut Water Kefir
Water kefir can be made using fruit juices, coconut water, mineral water or simply filtered water with added natural sugars. Add sugar if required to bring the content up to around 4% or 4 grams per 100 mls.
If the juice contains 3.6 grams per 100 ml, for example, that is 36 grams in a litre so you need to add around 5 grams of sugar if making a litre. Using measuring spoons a teaspoon is 4 grams.
Avoid using waters or juices with preservatives as preservatives may impact the kefir culture’s ability to grow and ferment the juice or water.
Tip: As you will not see any visible change we recommend keeping a small sample of the water or juice of your choice without any culture aside so that you can make a taste test comparison after fermentation.
Directions
- Wash and dry your hands. Clean and rinse all items to be used in kefir making. Using boiling water, scald off all metal and plastic items. Glass items should be rinsed in hot but not boiling water.
- Add sugar if required.
- Gently warm your dairy milk, lactose-free milk, non-dairy milk, fruit juice, filtered sugar water, or coconut water to around 30°C. Avoid scalding the milk when using dairy milk.
- Place warmed milk, water or juice into a large glass jar or food-grade plastic bottle, leaving at least 3 cm empty space in the top of your jar for air.
- Sprinkle one dose of Maintenance Free Kefir into your milk, juice or water and gently whisk until well combined.
- Cover the jar with a piece of tight weave cloth that will allow air circulation while preventing dust or insects from entering. Secure with a string or rubber band.
- Store in a warm place for 12 to 24 hours to ferment. On cooler times of year fermentation time can be extended to 36 or even 48 hours
- Your kefir will last in the refrigerator for a week to 10 days.
Keeping the Kefir Warm in Winter Months
Your Maintenance Free Kefir culture loves warm temperatures of around 25°C to 36°C. For best results, keep your milk, water or juices within this range during fermentation. Electric yoghurt makers are not suitable for kefir making as they run too hot and will damage the kefir culture.
|
|
 |
It's Ready When
While the kefir may be ready after 12 hours, many people choose to ferment their kefir for up to 24 hours and even longer to give themselves a higher probiotic hit!
Sometimes the flavour of the kefir can become quite strong and yeasty (so if you are new to kefir, or just want to cut some of the acidity, simply shorten fermentation time or serve with fruit or honey).
Second Fermentation
You can add an optional second fermentation step water and juice kefirs. Do this by capping your jar and fermenting for a further 12 to 24 hours to add natural carbonation to your water kefir. Be careful not to let too much pressure build up inside the jar as it may make weaker glass jars explode if left to over-pressurise. It is recommended that high-quality flip-top glass jars or flexible plastic jars are used.
Cleanliness
Maintenance Free Kefir is a combination of bacteria and yeast living together in unison. As with any fermented product, cleanliness is vital when making kefir.
You are deliberately creating the perfect environment to grow bacteria. Just be sure that you are only growing the starter culture that you have introduced and not some other microbe that blew in on the wind!
To avoid this, thoroughly clean and sterilise all of your utensils before using them. If you use bleach, vinegar or iodine to sterilise glass items, ensure that it has been completely rinsed off before use.
Storing Kefir Culture In The Freezer
When opening the sachet of culture we recommend bringing it to room temperature first. This will reduce the effect of the condensation causing some of the culture to stick to the inside of the sachet. Please keep jars of culture closed as much as possible to keep the powder dry.
Troubleshooting
The Most Common Problems Are:
- Temperature control: Remember that your kefir is a colony of living microbes. Overheating them above 38°C will cause heat stress and damage and by 40°C, your kefir culture is dying. If your kefir falls below 25°C your kefir culture will be too cold for optimal growth and will take longer to become delicious and may even stop growing altogether.
- Not adding a simple sugar: Adding sugar increases the amount of simple carbohydrates available for the culture to eat and can improve the end results of non-dairy or lactose-free and water kefirs. The sugar is used up by the culture and won’t be there in the end.
How to store the culture and how much to use.
This system will help you get the best value out of our yoghurt cultures, kefir and probiotic veggie culture while helping protect the culture from moisture and contamination.
The difference between Kefir Culture and Kefir Grains
Learn about the difference between the traditional grains and this Maintenance Free Kefir Culture
Making Kefir in Winter
Kefir ferments well between 25 to 36 deg C, but your kitchen is not that warm all year round. Extending the fermentation time is one solution or you can use an aquarium heater to make kefir in winter.